Monday, May 11, 2015

Hello Little Doggie

Hi everyone!  Happy Monday, hope everyone had a great weekend.

Today I wanted to share with you a fun card I made using fun new Pop-up Puppies stamps and coordinating Dog Sayings from Stampendous that I received as part of the  Clearscraps/Stampendous swap this week.
To create this card I used the Clear Scraps Fence Mixer and a Clear Craft Sheet, cut to size.  I chose to make my own card because...well, how cute is that little puppy head sticking over the fence looking for the bone?

To create the texture on the fence I simply ran my Fence Mixer through my Sizzix Machine and my Tim Holtz Wood Grain Embossing Folder.
Once my Mixer was embossed I ran my Staz-on white inkpad over the raised edges to "paint" the fence.
To create the card embellishments I simply stamped my images (two of the dog head to get the pop-up effect) and used water color pencils to color and a bit of the Stampendous Frantage Encrutsted Jewel Kit in blue to embellish my sentiment label. 
 I attached one of the dog heads to the fence, and the other to the base of the card so that when the card was opened the dog would still have a head.  
Bits of ribbon and trim finished off my embellishment.

Thanks for stopping by and be sure to check out all the other fun Stampendous/Clearscraps projects on the ClearScraps blog.

Hugs.

Wednesday, May 6, 2015

Shabby Little Paper Bag Pockets

Hey everyone!  Happy Wednedsay.  Today I wanted to stop by and share a shabby chic paper bag pocket and tags I made for a swap I was in.
 Filled with beautiful papers, resins, hand dyed lace and seam binding, these tags make my shabby heart sing.
I love this older Almanac paper from Prima Marketing.   I have been hoarding some of the items for years.
I of course used lots of inking and bits of  everything I had, some hand colored designs and of course some mini roses and stick pins.
I really hope she liked it all.

Hugs.

Tuesday, May 5, 2015

Congratulations - Chibitronics and Core'dinations

Hi everyone!  Sorry I missed you yesterday, it was a crazy weekend and I just, well.....

Anyway, today I want to share with you a fun little card I made for a friend's newest grand baby.  I have had this Stampin' Up set forever and these days it is rare that I break it out.  Of course, as my friends start having more grand children....

Congratulations Card
Congratulations Card Supplies:


 Step 1:  Cut white cardstock to size and stamp design.  I chose to color mine with watercolor pencils.
Step 2:  Cut yellow plaid to size and glue onto kraft card base.  Place cover design over cardstock base and poke holes through the design where you want to place the lights, leaving a mark so you know where to place them
Step 3:  Create light circuit being sure to place the lights where they can poke through the holes in the top layer.
Step 4:  Mount the colored design onto the Tilly Dot paper and use foam squares to make room for battery on.

I really love the way the "stars" twinkle on this sweet little card.

Hugs.

Friday, May 1, 2015

How to Bling out Your Name

Hi everyone!  Happy Friday.  I hope you have great plans for the weekend.  Things here shoujld be pretty quiet, doing some work in the yard, getting everything ready for summer and backyard season.

Today I want to share with you a quick and easy project I made to decorate my niece's room.  She, like lots of little girls, love things sparkly, and the adhesive rhinestone stickers from The Buckle Boutique make creating so simple.

I happened to have a bunch of these empty wood embellishment boxes lying around and decided that one would make a cute home decor item.  I began by choosing four different colors of the rhinestone sticker sheets.  There are so many patterns and colors to choose from, I am sure you will find the perfect one for your project.  Lili is a bit partial to green and teal these days.
 
These sheets are so easy to cut, all you need is a pair of scissors.  I simply measured the interior of each box and cut the rhinestones to fit.  Don't worry, if your measurements fall in the center of one of the rhinestones, your scissors will easily cut through.
From there, it was simply a matter of embellishment.  Of course her name, cut with my Sizzix and some Core'dinations papers, a few flowers and resin embellishments.  And finally, a new item from The Buckle Boutique, Silver Waffle Flatback Embellishments.    I really love the way this turned out and I can't wait to share it with her.

Hugs.

Wednesday, April 29, 2015

Believe in Yourself - Clear Scraps

Hi everyone!  Today I want to share with you a fun Word Title, Believe,.from Clear Scraps.  Believe was actually my "One Little Word" last year.  Because I need to take more time to believe in myself and what I am doing.  I created this word title to hang in my office so that, even though it isn't my word this year, I don't forget the lessons I have learned.  And let me tell you...these days.........................
Believe_clear scraps_word board_nancy keslin_final
This project was simple and quick to create.  I covered each letter with my patterened paper and then cut to fit.  A few floral embellishments and I was ready to go.
Believe_clear scraps_word board_nancy keslin
Clear Scraps has so many great word titles, and they are so fun to embellish.
Believe_clear scraps_word board_nancy keslin_final
So, what do you Believe in?
Hugs.
Nancy

Monday, April 27, 2015

Carte Recipe Box

hi everyone!  hope you had a great weekend, we had a busy one here.  can't believe we are already gearing up for cabana swim and summer time.  we spent the weekend cleaning the patio and getting the furniture ready for the season...whose idea was it to have so much wood furniture anyway.  lol

well, anyway....today I wanted to share with you a cute little recipe box i made using some prima papers and a new Sizzix die, recipe box, from eileen hull.

this is some older prima paper and chipboard, the almanac collection.  still working through the stash. 
this little box is the perfect size for little atg cards, small photos,

I always have little photos lying around that need to find a home, and i think this is just the place.

hugs.

Friday, April 24, 2015

Pion Designs and Clear Scraps

Hi everyone!  Hope your day is off to a great start!  Can you believe the weekend is here !  woo hoo!!!

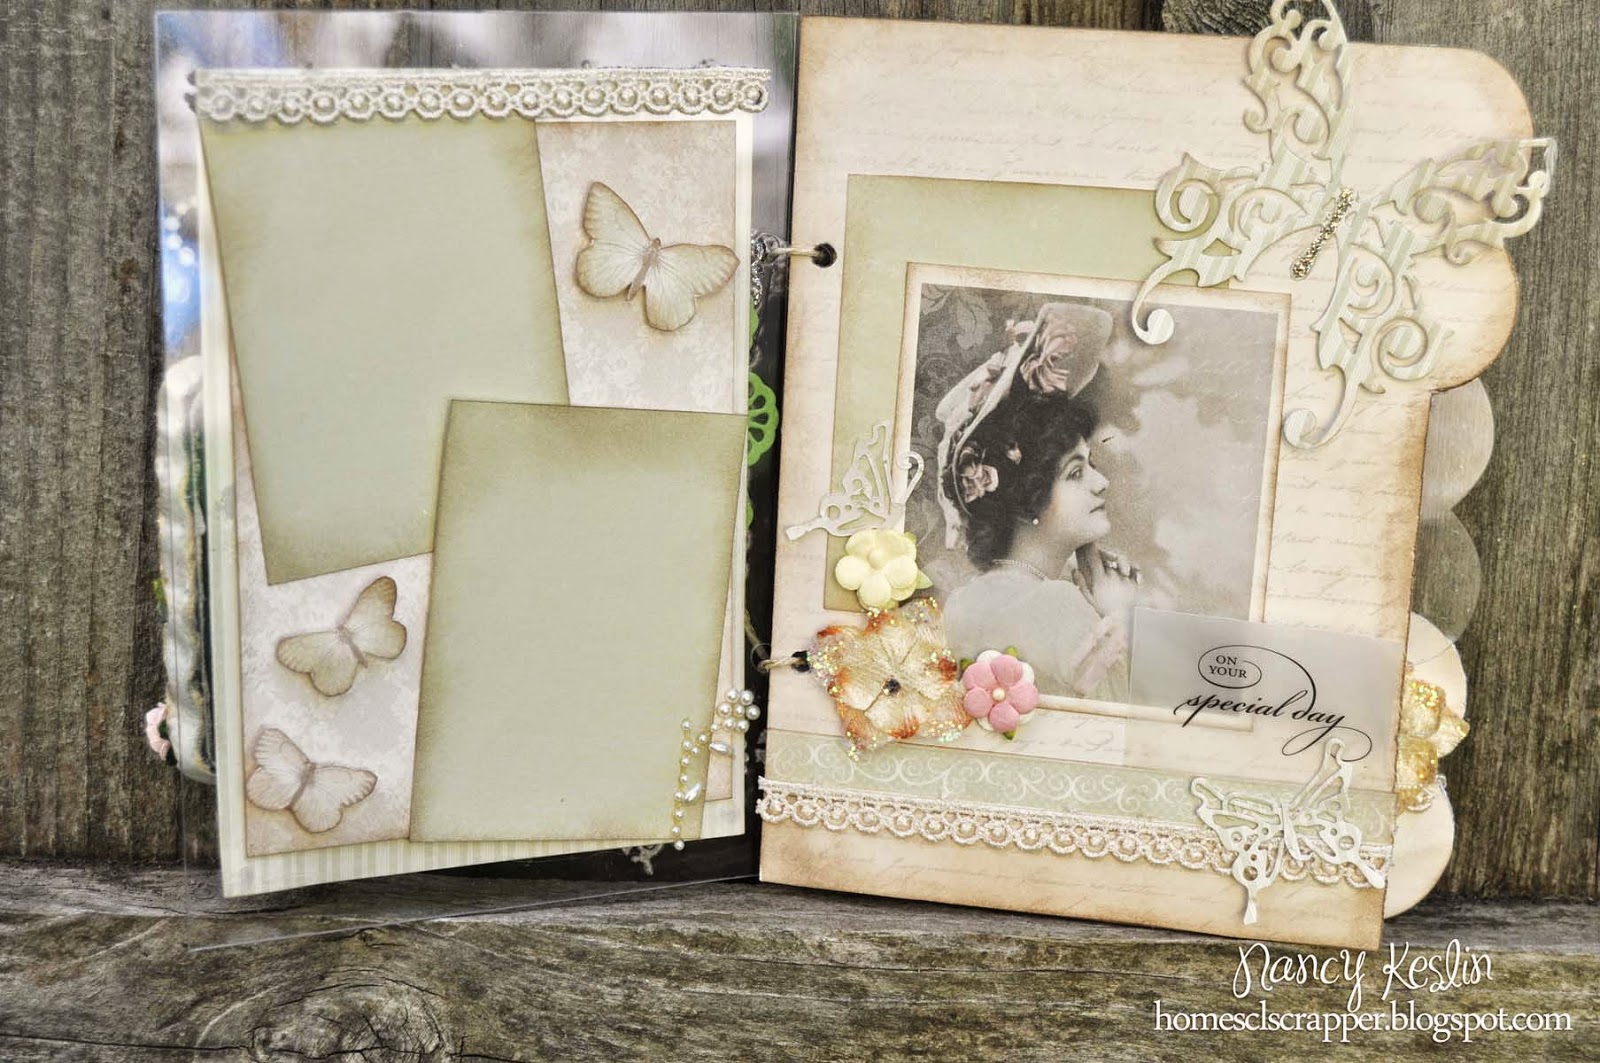
Today I wanted to share with you a mini album I  made using the Mixable Tabby from Clear Scraps and some beautiful papers from Pion Designs, Vintage Wedding.
I used a few dies, from both Prima and Sizzix to create the lacey shapes.  How much do I love that new huge butterfly?  swoon...... And that beautiful resin frame?  I painted it with some Ann Butler Earth Safe finishes that she gave me back at CHA.  They are so beautiful with a sheer irridescent finish.
 I love these Pion papers.  The double sided pages are perfect for the clear, acrylic peek a boos.
And the mix of patterns, solids, and images are so fun to layer.
 Of course, I couldn't resist adding lots of flowers (many from I am Roses), bit of bling....and of course more resins...well, not really resins; some I created with the new Mod Melts and then of course painted with the Earth Safe Finishes.
This mini album was so much fun to create, and simply stuffed with so many things I love.  I hope you love it to.

Hugs.