Ok, well now for the fun stuff. Much like many of you, I sent one of my lovelies off to college this year. She had been a bit down in the dumps, a little homesick, moving 3000 miles away is hard for both of us. I was sending her a care package (yes I know she had only been gone a week) and decided to make this fun light up card to light up her day. (insert apology, it got a bit crushed in the box...eek)
How cute are those little fairies, and the papers are so fun...but I think her favorite part was the way it lights up.
Supplies Used:
- Chibitronics LED Circuit Stickers Starter Set
- Chibitronics Tropical LED Lights
- Avery Elle Pixie Dust Clear Stamps
- Avery Elle Pixie Dust Ellements
- Avery Elle Brights Collection Paper Pad
- Avery Elle New Moon Pigment Ink Pad
- White Cardstock
- Kraft Cardstock
- Favorite Medium for Coloring
- Foam Dots
- Sizzix Machine
Step 1: Stamp with pigment ink onto white cardstock and color. I used Copic markers for my card
Step 2: Die cut images from white cardstock. The Avery Elle Ellements are so much easier than fussy cutting.
Step 3: Determine layout of design elements. This step allows you to determine where you want the lights to go.
Step 4: Make holes in top layer for lights to shine through and mark light placement onto white cardstock base for reference.
Step 5: Use copper tape from Chibitronics to create parallel circuit. Make sure and mark your positive and negative tapes for battery placement.
Step 6: Insert battery and check that circuit is properly functioning.
Step 7: Since I was going to be mailing the card and didn't want the battery to die, I inserted a simple switch (piece of paper) between the battery and the copper tape. Once the piece of paper is removed the circuit is complete and the card will light up. This step is totally unnecessary if you are giving your card immediately, but I would hated to have the card arrive without the lights. LED lights last forever and the batteries last a good time as well, but better safe than sorry.
Step 8: At that point it was just a matter of assembling the card. I used lots of foam dots to give the card dimension and allow for room of the battery and lights.
And that's it. Super fun, super cute, and I know she will sparkle brightly in her new adventure.
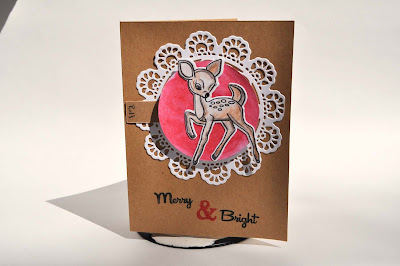
Oh, and because Avery Elle was so generous I also had the goodies to make this holiday card using the same basic techniques. How cute is Rudolph's nose?
Thanks for dropping by,
Hugs


No comments:
Post a Comment