Showing posts with label flowers. Show all posts

Saturday, February 6, 2016

Tinkerbell Fairy Light and Card

Hey everyone...well, I warned you that I wouldn't be around as much.  lol  But here I am today to share with you a tutorial for the Disney Pixar Blog Hop.

Welcome to the Disney Pixar Blog Hop!


Disney and crafting are a magical combination, and we are so happy you joined us to day for this blog hop.  Some of the crafters participating in this event have been doing this together since 2011!  Over the years the hop has grown but one thing has always stayed the same . . . amazing crafting projects that feature your favorite characters from Disney and Pixar movies.

For 2016 we are going to attempt to have a hop every other month for the entire year . . . February, April, June, August, October and December.  If you are on Facebook you can like the group page so that you can be the first to learn about each upcoming event.  Just click HERE to go the the Facebook page.

To make sure you don't miss any of the fun, be sure to start at Shawn's blog to see all of the projects.  Just click HERE to head over to her blog and then follow the hop line up at the bottom of the post to see everyone's projects.

Tinkerbell Fairy Light

My little niece, like many girls her age, is obsessed with few things in life, the first, Frozen, and the other, Tinkerbell.  Well, she has been scared of the dark lately so I decided to help her out with this little night light.


Supplies Needed:

  • Mason Jar
  • Mod Podge
  • Epson Salts
  • Battery Operated Tea Light
  • Tinkerbell Sticker (I created my own with Cricut)
  • Foam Adhesive
  • Assorted embellishments for top


Step 1:  Coat mason jar with a thin layer of Epson Salts.  You can tint your Epson Salts with a bit of food coloring if you like...I used a bit of red to make pink.  For extra hold, you can spray a bit of poly sealer over the Epson salts.
Step 2:  Create Tinkerbell sticker image.  I used the Print & Cut feature on my Cricut machine to create the sticker, but if you have a favorite sticker, feel free to use it.

Step 3:  Attach Tinkerbell sticker to tea light using foam adhesive.


Step 4:  Embellish Jar.  I used some small flowers and a bead spray to decorate the top of my mason jar, but feel free to use whatever you have handy.

Super quick and easy.  Definitely something you can make in an evening.  I think my niece and her friends may even choose to make them as a craft for her upcoming birthday party.

Of course the light had to come with a card.  And what is more fun than a shaker card.

Tinkerbell Shaker Card

Supplies Needed:
  • Card Blank (I used a chalkboard card from Core'dinations)
  • Patterned Papers
  • Sizzix Die
  • Foam Tape
  • Clear Acrylic
  • Sequins and Small Beads
  • Embellishments

Step 1:  Cut hole in center of cardstock to create window for shaker.  I love these thinlet dies from Sizzix when used with the magnetic plate.  This combination allows me to place my window exactly where I want.
Step 2:  Add acrylic to the inside of the window and surround window with foam tape.  You want to make sure and not have any holes that your sequins can fall out.  Looking for acrylic?  Try old packaging.
Step 3:  Fill with window with sequins and small beads.
Step 4:  Attach to cardstock base.

Step 5:  Embellish front of the card as desired.

Before you go, make sure to enter to win our prize for this hop . . . a Disney paper pack from Queen & Co. 


The paper stack will not even be shipping out to stores until late February 2016, so you can have it before the stores are even selling it!  Note: Due to the fact that we received this paper stack so early, it is considered a promotional proof and there could be some slight variations from what will be shipped to stores.

- - - 
a Rafflecopter giveaway
- - -

Good luck, and enjoy the rest of the hop!

The full blog hop line up is below.  


Monday, August 3, 2015

A Little Mixed Media RAK

Hi everyone!  Today I wanted to share with you a little mixed media canvas I made for a swap with a group on Facebook.  The swap didn't go so well....someone who shall remain nameless flaked on me, but....Karma.

Anyway, I really liked the way this canvas turned out and had been waiting to share it and hers...but you know how that goes.  sigh

The individual whom I was swapping with said she really liked white, so.....lots of shades of white and cream...a few of my favorite goodies, canvas, wood, Prima flowers, bits of older papers....it is hard to see, but there is some inking, some gesso, etc.

I hope that she really likes her canvas and the other goodies I sent.  I have decided to take the high road and believe that if someone really needs this canvas and a few other goodies that badly, then I will look at this as a RAK as opposed to a swap.

Hugs.

Wednesday, July 29, 2015

Clear Scraps Trinket Box

Happy Wednesday, Nancy here today to share with you an acrylic box I made.  I love these little boxes that came out at the CHA Winter Mega Show.  
Box_acrylic_prima_clear scraps_nancy keslin
I chose to keep the box fairly simple, adding just a bit of lace sticker around the sides, along with a piece of Prima chipboard in the front.  
Box_acrylic_nancy keslin
The inside bottom was lined with a piece of Rowlux film, giving it a fun sea glass texture .  This film is super fun to use when designing projects as it offers a great texture with ease of cleanup.  Oh, and it comes in so many fun textures and colors...Go check it out.
Box_acrylic_rowlux film_nancy keslin
Finally for the top I added a large doily that I cut with my Sizzix,  a few bits and pieces of Prima flowers and fussy cut papers, along with a few chipboard pieces.  Oh, and how fun is that little tassle I found in my stash?  I think it is Prima as well.
Box_acrylic_top_nancy keslin
This box was quite simple to assemble and embellish and will sit on my night stand to hold little trinkets while I sleep.
Hugs.
Nancy

Wednesday, June 24, 2015

Accept Home Decor Clear Scraps and Crate Paper

Hi everyone, Today I want to share with you a fun, custom, wall decor piece I made using an XL Dots and a custom Clear Word Title.  Did you know you can get custom orders from Clear Scraps?  

My One Little Word this year is Accept.  Sometimes I find it difficult to accept things the way they are.  So I made this home decor piece to remind me to accept the things I can not change.  Whether that is with my body, my relationships, my children.  Sometimes you just have to let things go and accept them the way they are.  It really is hard for me and my perfectionist tendencies to just let things go....

Anyway....I of course used some of my favorite Crate Paper papers and embellishments and a few flowers from I Am Roses.
Accept_clearscraps_crate paper_nancy keslin
To create the texture on my word title I simply painted the back side with a bit of acrylic paint, then used Staz-on White ink to stamp a pattern with a stampendous stamp.  After stamping with the white ink, I added a bit of color with another ink pad.
I am really happy with the way this turned out.  

Thanks for stopping by.
Hugs.

Friday, May 29, 2015

Shabby Little Tags

Hi everyone!  Happy Friday.  Today I want to share with you a little tag I made for a challenge over on Facebook.

In order to make this tag I used lots of Tim Holtz Distress Inks on a manilla tag over a bit of embossing done with my trusty Sizzix Machine.
I layered a Prima Paintables ATC card that I colored with water color pencils as well as a few sticker and wood letters also from Prima.   
A few leaves and flowers that I colored with some Lindy's Stamp Gang sprays and a few butterflies I created using ModMelts painted with my favorite Ann Butler Earth Safe Finishes Irridescent Glaze. Finally, a bit of seam binding, also dyed with a bit of Lindys.

This project really was so fun to make.

Have a great weekend.  Hugs.

Friday, May 1, 2015

How to Bling out Your Name

Hi everyone!  Happy Friday.  I hope you have great plans for the weekend.  Things here shoujld be pretty quiet, doing some work in the yard, getting everything ready for summer and backyard season.

Today I want to share with you a quick and easy project I made to decorate my niece's room.  She, like lots of little girls, love things sparkly, and the adhesive rhinestone stickers from The Buckle Boutique make creating so simple.

I happened to have a bunch of these empty wood embellishment boxes lying around and decided that one would make a cute home decor item.  I began by choosing four different colors of the rhinestone sticker sheets.  There are so many patterns and colors to choose from, I am sure you will find the perfect one for your project.  Lili is a bit partial to green and teal these days.
 
These sheets are so easy to cut, all you need is a pair of scissors.  I simply measured the interior of each box and cut the rhinestones to fit.  Don't worry, if your measurements fall in the center of one of the rhinestones, your scissors will easily cut through.
From there, it was simply a matter of embellishment.  Of course her name, cut with my Sizzix and some Core'dinations papers, a few flowers and resin embellishments.  And finally, a new item from The Buckle Boutique, Silver Waffle Flatback Embellishments.    I really love the way this turned out and I can't wait to share it with her.

Hugs.

Friday, April 24, 2015

Pion Designs and Clear Scraps

Hi everyone!  Hope your day is off to a great start!  Can you believe the weekend is here !  woo hoo!!!

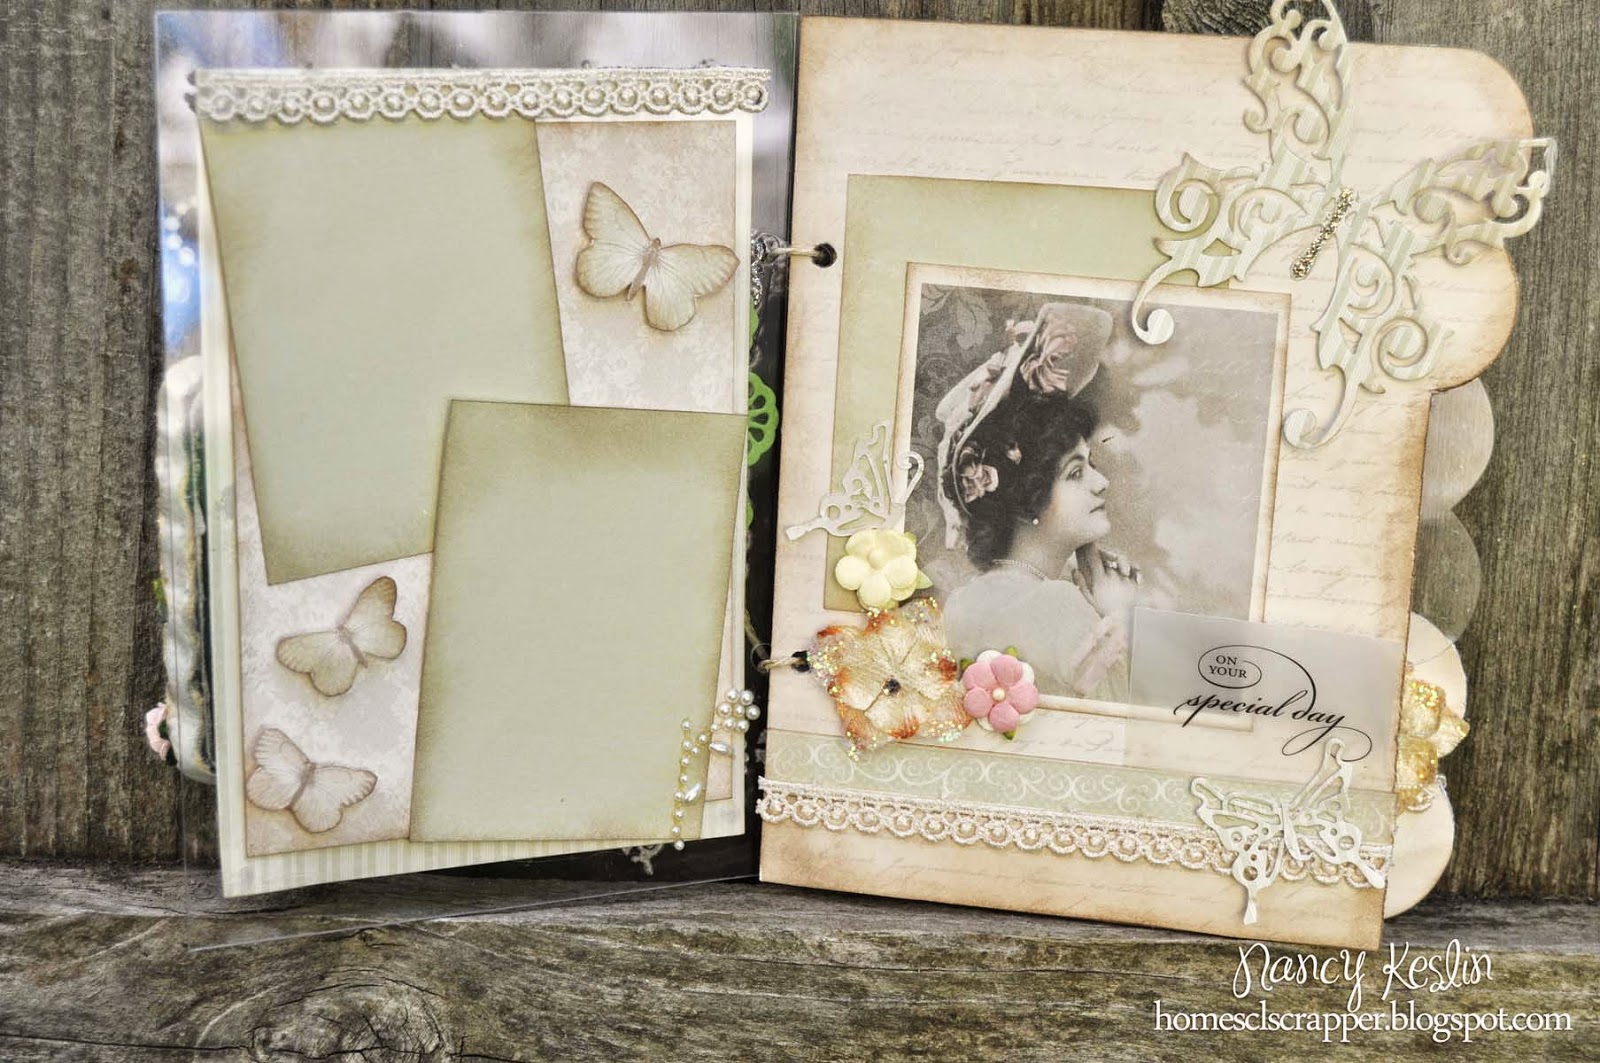
Today I wanted to share with you a mini album I  made using the Mixable Tabby from Clear Scraps and some beautiful papers from Pion Designs, Vintage Wedding.
I used a few dies, from both Prima and Sizzix to create the lacey shapes.  How much do I love that new huge butterfly?  swoon...... And that beautiful resin frame?  I painted it with some Ann Butler Earth Safe finishes that she gave me back at CHA.  They are so beautiful with a sheer irridescent finish.
 I love these Pion papers.  The double sided pages are perfect for the clear, acrylic peek a boos.
And the mix of patterns, solids, and images are so fun to layer.
 Of course, I couldn't resist adding lots of flowers (many from I am Roses), bit of bling....and of course more resins...well, not really resins; some I created with the new Mod Melts and then of course painted with the Earth Safe Finishes.
This mini album was so much fun to create, and simply stuffed with so many things I love.  I hope you love it to.

Hugs.

Tuesday, March 17, 2015

A Little Green

Hi everyone!  Happy St. Patrick's Day!  Today I wanted to stop by and share with you another projects we made using the Canister Die from Eileen Hull and Sizzix. This time, Ainsley's creation. This die is so versitile.

Ainsley needed a little container to hold all her makeup brushes...and we thought that this die would be just perfect.  The original cut was just a bit tall, so we decided to cut it down to 4 inches...perfect.

Of course, she had to go all out with the embellishments.   Ainsley chose some pink pleated trim from May Arts, a few flowers, bits of bling and a resin butterfly from Prima Marketing, and of course I couldn't resist throwing in a bit of new trim I had from Decorative Trimmings.

Hugs.

Friday, February 13, 2015

Me & U and SVG Cuts

Hi everyone!  Happy almost Valentines Day!  I hope you spend this weekend devoted to love with those you love and care for.

Today I wanted to stop by and share this little box I made using a cut from SVGCuts.  It is from the Vintage Valentines Kit...and I just love it.  I of course made the box itself from Core'dinations Cardstock.  The 110lb is the perfect weight for home decor and boxes....I inked the sides of the box to have them coordinate with the older Fancy Pants papers I found in the stash.  Of course, I couldn't resist adding a layer of rhinestone stickers from The Buckle Boutique as well as a few flowers from my stash.

Happy Valentines Day.
Hugs

Wednesday, January 28, 2015

Love Notes - Core'dinations

Hi everyone!  Happy Wednesday.  Sorry I haven't been around much, it has been a crazy busy past few weeks.  With the holidays, which we spent two weeks in Hawaii, and then CHA, there just hasn't been much time for blogging.  Be sure and check out my other channels to see what's been going on....links are in the side bar ----------------------------------->


Anyway, wanted to stop by and let you know that I have a post up over on the Core'dinations blog today...one featuring this sweet little Valentine's mailbox...with a complete tutorial.  Come check it out.

Hugs.

Wednesday, January 14, 2015

Our Day Word Board-Clear Scraps

Hi everyone! Today I want to share with you a new product from the ClearScraps word board collection, Our Day.  I knew as soon as I saw this board that I needed to pull out the old wedding photos and get to work.  I can't believe it has been almost 22 years.  eeek!  Where did the time go?

To create this word board I collaged some beautiful Prima papers to the back of the acrylic, cut out papers to back the letters in the title and then added my photos behind.  


Finally I embellished over the top of the acrylic with chipboard, resins, and flowers..  This project was so much fun to make and a great way to highlight our special day.  


Be sure and check out all the new word boards that Clear Scraps has to offer.
Nancy