Showing posts with label banner. Show all posts

Monday, March 7, 2016

Bunny Banner

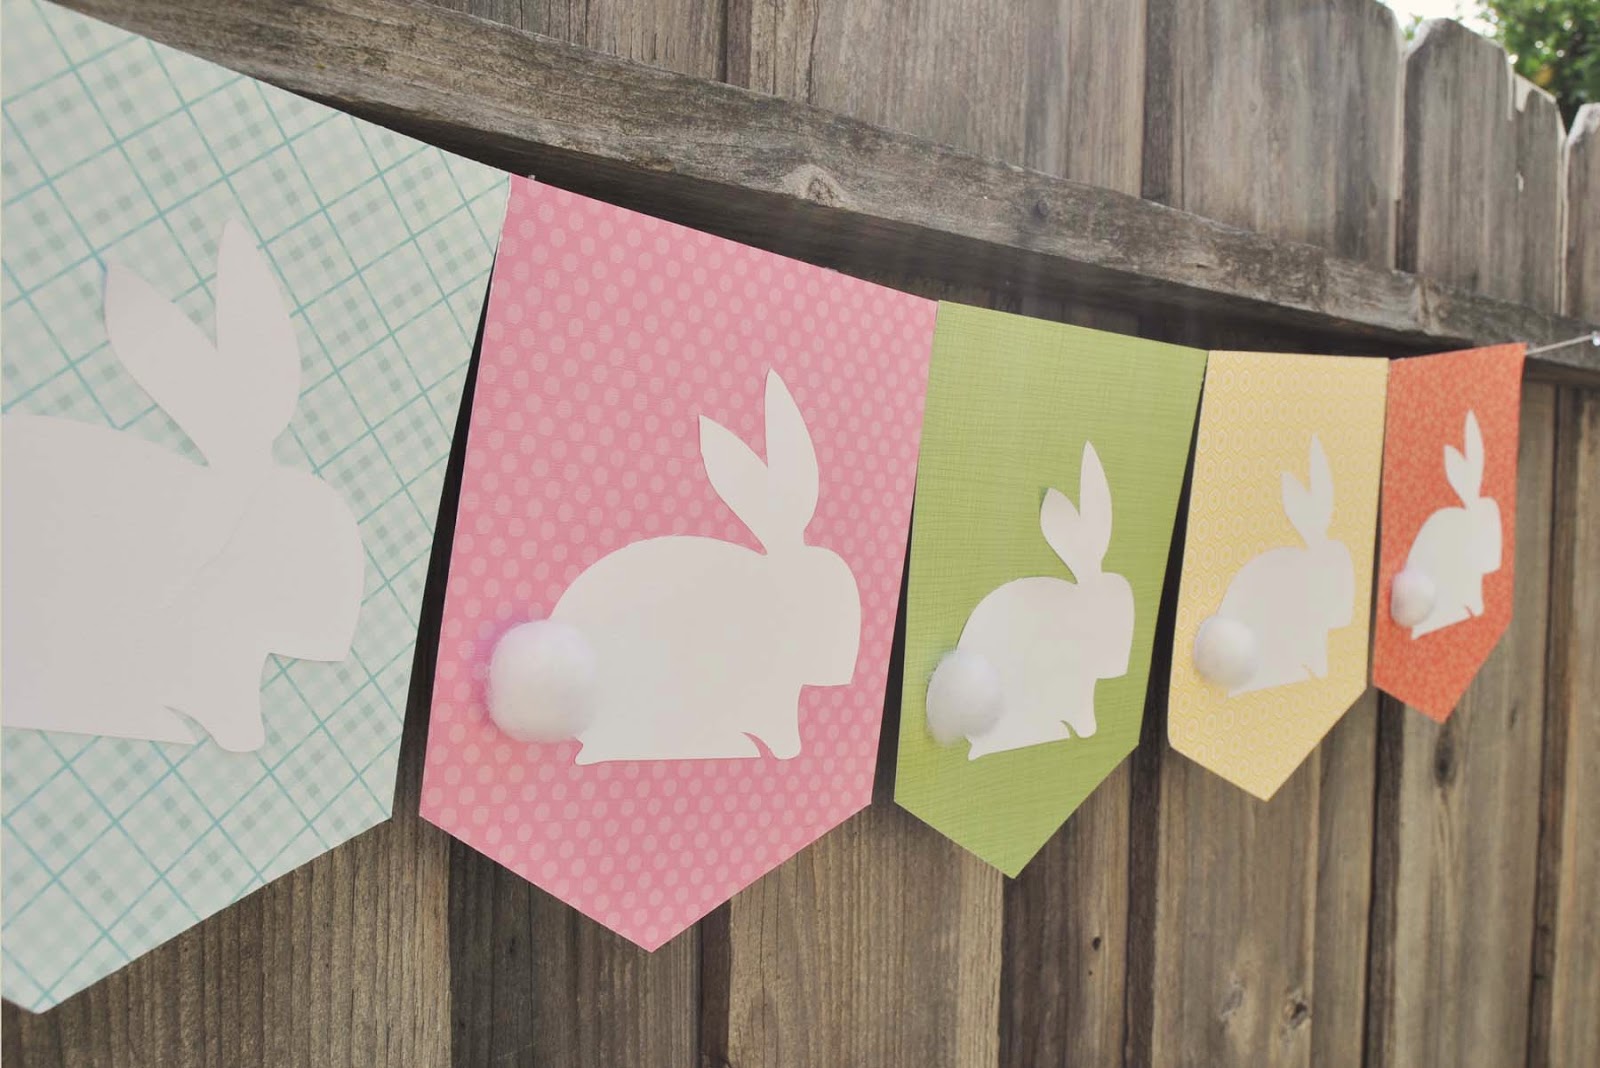
Hey everyone!  Hope you are having a great day.  Well, it is that time of year...time to pull out the Easter decorations and start decorating the house.  I can't believe I made this banner a year ago now for Core'dinations.  I still love their line of patterned papers....sometimes the simple is just perfect.  This banner was inspired by a table runner I saw in a local shop.  So cute....and this was so quick and easy.
bunny-banner_coredinations_nancy-keslin
Bunny Banner Supplies:
  • Core Basics Patterned Paper  Yellow Hexagon
  • Core Basics Patterned Paper  Orange Flower
  • Core Basics Patterned Paper Light Green Crosshatch
  • Core Basics Patterned Paper Teal Plaid
  • Core Basics Patterned Paper Light Pink Large Dot
  • 2 sheets Core Basics White 80lb 12x12 Cardstock
  • Darice Hemp Twine
  • Cotton Balls
  • Electronic Cutting Machine or Template
bunny banner_coredinations_nancy keslin_supplies
Step 1:  Cut each sheet of patterned paper to 8x10 inches.  I chose to make my banner 5 sheets wide, but you can make more or less according to your needs.
bunny banner_coredinations_nancy keslin_step 1
Step 2:  To create the pennant shape; on the 8 inch side make a mark at 4 inches.  This is the middle of the paper.  On both edges, make a mark at 2 inches from the bottom.  Connect the dots to create your shape and cut out.  Do this for each of your papers.
bunny banner_coredinations_nancy keslin_banner shape
Step 3:  Cut bunny image using an electronic cutter, or a quick search on Google will find many "Easter Bunny Templates" that you can print and cut.  I cut my bunnies to 6 inches on the Core'dinations White Cardstock.  I was easily able to cut all 5 with two pieces of paper.  Attach one bunny to each of the pennant shapes.
bunny banner_coredinations_nancy keslin_bunny
Step 4:  Arrange your pennants in the order you would like and hot glue twine to the back to create the hanger.  I chose to place mine very close together so the banner wouldn't dip quite so much.
bunny banner_coredinations_nancy keslin_twine
Step 5:  Attach cotton balls to tails of bunnies and hang.   hint:  You don't want to attach the tails before you glue the pennants together as the extra dimension makes it harder to place the glue.
bunny-banner_coredinations_nancy-keslin_side-1024x683
I hope you make this fun banner this spring for your family and friends to enjoy.

~Nancy


Friday, December 11, 2015

Snowflakes and Dishes

Hey everyone!  Happy Friday!  Guess what I have to share with you today.....yep, more Christmas projects, this time with ClearScraps and my Cricut.

 I had this 6x6 circle mini album lying around in my stash for ages and thought how fun to turn it into a banner.
 
I simply cut some snowflakes and my sentiment from vinyl and attached it to the circles.  A bit of glitter thread and voila...a snowflake banner.  Of course I had to bling it up a bit with rhinestones in the centers of the snowflakes and beaded drops in between.
Wondering where the dishes come in?  Well, I decided to hang my banner over the kitchen sink.  I don't know about you, but it seems I am spending quite a bit of time hanging out over my kitchen sink these days and seeing this sparkle in the sunshine really helps the time go by much more quickly.
Thanks for dropping by.
Hugs.

Wednesday, September 23, 2015

Are You Ready for Some Football? Party Supplies with Core'dinations

This is a fun set of projects I made last winter for Core'dinations and Darice. With football season upon us I thought I would share again.  This set of projects was super fun and easy to create and can be made in your favorite teams colors.  Thanks for stopping by.
football_coredinations_party_nancy-keslin
Materials needed to make your own Football Party Supplies:
football_coredinations_party_nancy keslin_supplies

Banner Instructions:

Step 1:  Create pennant template by cutting a triangle 5×7 inches.
football banner_coredinations_nancy keslin_pennant template
Step 2:  Trace template onto green Core’dinations Spotted paper.   I was able to get five pennants onto one 12×12 sheet.  For this banner you will need a total of seven pennants.
football banner_coredinations_nancy keslin_placement
Step 3:  After cutting out the pennants add strips of White paper from the Core’dinations Neutrals to create yard lines.  I cut my strips 1/4 inch wide and trimmed to fit.
football banner_coredinations_nancy keslin_stripesStep 4:  Use Die Cut machine or punches to create the circles and letters for each pennant from both the white Core’dinations Neutrals paper and orange Spotted paper.  The orange circles were cut to 2 1/4 inches, the white circles to 2 inches and the letters to 1 1/2 inches.
football banner_coredinations_nancy keslin_cutsStep 5:  Assemble pennants and sand lightly using the Sand-it Gadget.
football banner_coredinations_nancy keslin_layers
Step 6:  Add holes to each pennant and string together using the Darice Hemp Cord.  I also added a football that I cut using my die cut machine for added interest.
football-banner_coredinations_nancy-keslin_string

Treat Holder Instructions:

Step 1:  Cut treat holder shape with electronic cutter or by hand using templates readily available on the internet (search for “popcorn box template”) using medium brown paper from the Core’dinations Neutrals pack.
popcornbox_coredinations_nancy keslin_cutsStep 2:  Sand using the Sand-it Gadget and remove excess paper dust with the Dust Buddy.  I love how the Dust Buddy removes all the paper fibers from both my project and work space.  The sanding gives the cardstock a nice weathered texture, similar to a football.
popcornbox_coredinations_nancy keslin_distressStep 3:  To create laces on your “football” treat holder, cut strips of white cardstock from the Core’dinations Neutrals 1/4 x 1 inch.  ( you will need six strips for each box)
popcornbox_coredinations_nancy keslin_lacesStep 4:  If you would like to add additional stripes to your “football” those are also cut at 1/4 inch and can be wrapped around the box and trimmed to fit.
popcornbox_coredinations_nancy keslin_assembled
Additional project:  To create football picks for the cupcakes, or they would be fun in sandwiches, I simply cut additional footballs with my electronic cutter and attached them to toothpicks with a bit of glue.


Friday, July 3, 2015

Patriotic Banner - 4th of July!

Ugh...I can't believe it is already July....where has the summer gone?  Things here are crazy busy with swim, and the season is flying by.   I haven't hardly taken any photos of the children...hopefully today as we are headed to the beach in a bit.  

Well, today I wanted to share this banner I made for Core'dinations.  I love the Basics Patterned papers...they are so fun and suit my every paper need.  OMG....and the new Tim Holtz Metallics....swoon!  They are gorgeous to say the least.  
banner_angle-1024x680
Patriotic Banner Supplies:
banner_suppliesStep 1:  Cut Patterned papers into circle shapes.  I chose to alternate the pattern by doing some large red and some large blue.  The largest circles were cut to 6 inches.  The white Polka Dot Pops to 4 inches and the inside circles to 3 inches.  I cut enough circles to make 8 completed pennants. (four of each color and eight of the white).
banner_cut_circlesStep 2:  Cut 16 stars from the Tim Holtz Metallic Kraft Core paper.  Don't those stars look like metal?  I have a project in mind for more of this paper, as soon as I find the time.
banner_starsStep 3:  Assemble your circles by layering the colored circles.   I created a large red circle with a blue center...
banner_redand a large blue circle with a red center, glue securely.  How fun is the mix of patterns.  There is something like 150 different papers in the set.  crazy, huh.
banner_blue
 Step 4:  Fold each set of circles in half and attach one of the Tim Holtz Metallic Kraft Core stars on each half.
banner_fold_star
Step 5:  Place twine through the folded circles and adhere the circle closed.  Be sure to add plenty of adhesive as you don't want your banner to unfold or your layers to peel back.
banner_stringThis little banner is so much fun, and by having the design on both sides it can easily be used in any location.


Monday, May 18, 2015

Spring into Banners

Hi everyone!  Hope your Monday is off to a great start...mine is obviously a little slow.  lol  Today I wanted to share with you a banner I made for Clear Scraps using  the Small Pennant Banner and some beautiful Echo Park Victoria Gardens papers that have been in my stash.

 I love the mix of papers here with some odds and ends on my desk....And look at those beautiful dragonfly mirror embellishments that are now available from Clear Scraps as well.  Swoon....
For now this banner is hanging, but I think I may add a few photos on the backsides of the banner...after all, because of the clear acrylic I already have paper covering it, and turn it into a fun little mini

Hugs.

Friday, May 15, 2015

Make your Graduation Party Shine - Coredinations

Happy Friday everone!  Hope you have great plans for the weekend.  Things here are getting a bit crazy with end of the year things and swim season.  And you know what else is this time of year?  Graduation!  Check out the post I have today over on the Core'dinations blog showing how with just a few Core'dinations products you can make all these gorgeous party decorations.

Have a great weekend.

Hugs

Wednesday, March 11, 2015

Here Comes Peter Cottontail.....

Hi everyone!  Hope you are having a great day.  Here we are getting ready for Easter.  So looking forward to it this year.  It will be so nice having Brighton home, and I love decorating for the holiday....maybe we will even do an egg hunt?  Well, I don't know if the children are up for that....maybe if I put money in the eggs.  lol

OK, anyway....wanted to let you know I have a post up over at Core'dinations featuring this Bunny Banner.....with a complete tutorial of course.


Go check it out.

Hugs.

Friday, December 19, 2014

Believe Christmas Banner- Clear Scraps

Hi everyone!  Today I want to share with you a simple little banner I made for my niece.   I love the cute Believe Banner from Clear Scraps, and knew it would be perfect for her room.  (I did remove two of the pennants to make it fit better in her space, and no...the fence is not in her room.  lol)
Holiday_banner_clear scraps_nancy keslin
Filled with vintage, childhood images and papers from October Afternoon, I knew she would enjoy this piece for years to come.  My sister is always asking for me to make things for her home.  hee hee
Holiday_banner_clear scraps_nancy keslin_1
Sweet little stuffed animals, buttons, bling, and snowflakes, which were die cut from a Simon Says Stamps die,
Holiday_banner_clear scraps_nancy keslin_3
and of course Santa coming down the chimney with his bag of goodies to place under the tree.
Holiday_banner_clear scraps_nancy keslin_santa

How will you decorate this holiday season?  Do you do anything in your children's rooms?

Wednesday, November 12, 2014

Rustic Fall Banner - Coredinations

Hi everyone!  Hope you are having a great week!  Things here are fabulous...ok, maybe not fabulous, but good.  The holidays are rapidly approaching and we are crazy busy with all that that entails.  Lots of school projects, holiday projects and of course crafting and creating,  Anyway,,,,today I wanted to share with you this Rustic Fall Banner I made for Core'dinations!  This is a simple project that takes just a bit of time to create, and can be expanded to fit just about any theme.  Fall-banner
Rustic Fall Banner Supplies:
fall_banner_coredinations_nancy keslin_supplies Step 1.  Cut Kraft cardstock to 4×6 and emboss with the wood grain embossing folder.  I used Tim Holtz Wood Grain Texture Fade.fall banner_cut_emboss_nancy keslin_coredinations_edited-1 Step 2.  Create pennant shape by marking the center of the rectangle one inch from the bottom, draw lines to to the corners, and cut.  This is how I create all the banners that I use and can easily be adapted to any size bunting.  This shape is quite popular in scrapbooking and I use it all the time.  A centering ruler really comes in handy here.fall_banner_pennant_nancy keslin_coredinations_edited-2 Step 3.  Cut letters for word or sentiment from black cardstock in your favorite font and center on pennants.  I used my Cricut to cut these, but any die cut machine, manual or electric would work.  Or you could use precut alphabets.fall_banner_letters_nancy keslin_coredinations_edited-1 Step 4.  Score top of pennant at 1/2 inch.  This will create a pocket for your cord.  You don't really need the pocket, but I find it gives the finished project a much more finished look.  You could poke holes in the pennant and string through that if you like.fall_banner_score_nancy keslin_coredinations_edited-1 Step 5.  Run cord through all the pennants and seal with glue, or for extra interest sew closed.  I chose to sew my pocket closed as it added a bit of interest. fall_banner_coredinations_nancy keslin_string
Step 6.  Tie cinnamon sticks in a small bundle and thread onto cording, one at each end.  They give the banner of lovely fragrance.fall_banner_coredinations_nancy keslin_cinnamon sticks
Step 7. Finish by clipping bird next to the cinnamon sticks.  This just gave the ends some weight so that I could swag the banner across my mantle, but the birds and cinnamon sticks are really just for embellishment.
fall_banner_coredinations_nancy keslin_birdThat's it....all done!  And so easy.  

Thanks for stopping by.

Hugs.

Nancy