Wednesday, July 1, 2015

Pretty Paper Succulents

Hey everyone!  Are you looking for a way to bring some of the beauty of the desert into your home this spring?  Succulents are all the rage in home decor.  Why not create these pretty paper succulents from some of your favorite papers?  These pretty paper succulents are perfect for our California drought...and I don't have to worry about killing them.  lol
succulents_coredinations_nancy-keslin_final1-1024x680
Paper Succulents Centerpiece Supplies:
succulents_coredinations_nancy keslin_supplies
Step 1:  Cut shapes by hand from template or using electronic cutter from your favorite colors of Tim Holtz Kraft Core papers.  I chose shades of greens and blue.
succulents_coredinations_nancy keslin_cutsStep 2:  Assemble succulents.
succulents_coredinations_nancy keslin_assembled
Step 3:  Create box from cut file from Tim Holtz Kraft Core Shattered collection.   I chose a long rectangular box, but you could choose a different shape, and cut it from a neutral paper.
succulents_coredinations_nancy keslin_box
Step 4:  Cut Styrofoam pieces to fill box and create a substrate to glue the succulents on.
succulents_coredinations_nancy keslin_styrofoam
Step 5:  Hot glue each of the succulents to Styrofoam.
succulents_coredinations_nancy-keslin_complete-1024x680
Step 6:  Fill blank spaces between the succulents with Spanish moss.
succulents_coredinations_nancy-keslin_moss-1024x680
I hope you create something beautiful for your home this spring!

Monday, June 29, 2015

Make your Subway Art Sparkle

Hi everyone, Hope you are having a great day.  Well, if you know me...follow me on Facebook and Instagram, you may know that we drink quite a bit of wine around here....well, maybe not drink, but we do buy a lot.  lol  I decided to make this lovely Subway Wall Art for our home.  With just a few supplies, your home will be sparkling in no time.
wine_art_coredinations_nancy-keslin_final-1024x839
Sparkly Wine Subway Art Supplies:
Step 1:  Adhere Core'dinations 12x24 Glitter paper to chipboard or cardboard sheets to form a sturdy backing.  You can even use cereal boxes if you like.  Just be sure to place them right next to each other to form a solid backing.  A little extra tape along the seams will make everything sturdy.
wine_art_coredinations_nancy keslin_background_glitterStep 2:  Use electronic cutter to design your Subway Art.  I used a pre designed peice from Cricut.  But with a mixture of fonts and words, you can create your own piece in a short period of time.  Cut design using sheets of the Tim Holtz Kraft Core Nostalic Collection.   My design created a 12x24 piece so I used two sheets of the same color.
wine_art_coredinations_nancy keslin_cutStep 3:  Adhere cut letters to the glitter paper.
wine_art_coredinations_nancy keslin_stickStep 4:  Having a hard time determining the spacing of your letters?  Try using the negative of your letters as a template.
wine_art_coredinations_nancy keslin_templateThis was a super quick and easy project to make.  With the Core'dinations Glitter Paper and the wide varitey of cardstock available, the sky is the limit to what you can create.  How fun to have a baby room art with names of nursery rhymes?  A child's favorite sport with all the terms listed out, song lyrics....let your imagination run wild.
wine_art_coredinations_nancy-keslin_side-1024x680

Saturday, June 27, 2015

Tinkerbell Box Card - Disney Pixar Blog Hop

Hi everyone!  Welcome to the Original Disney Pixar Blog Hop.  You should have arrived here from  Shawn's blog.   If not, you may want to go back as this is the beginning and you know you want to see all the great inspiration along the way.

I decided to create this fun little box card for my niece's birthday.  I wanted to give it to my daughter, but she says she is too old for fairies...who is too old for Tink?  not me.
 Fairy Box Card Supplies:


Step 1:  Cut papers and begin assembly of box.  I started with the inside.  Adding the back and the scallops that will fold over.  I love the texture of the solids in this paper set.
Step 2: When you stand the box up, the box is already decorated for you.  The yellow dots on the outside and the yellow scallops folding over.
 Step 3:  Add additional flag pieces as well as the inside pieces that will old our fairy embellishments.
Step 4:  To create the rhinestone flag pieces cut a template from plain cardstock and then simply trace onto the rhinestones.  The rhinestones cut easily with a simple pair of scissors.
 Step 5:  I used the print and cut feature on the Cricut Explore to create Tink and her friends.  The print and cut feature is so easy to use, you will be creating in no time.
 Step 6:  Leyer your faries with a few flowers and done.

Your next stop on the hop is....Lori.  I have attached the entire line up below, just in case you get lost.....

Disney Pixar Blog Hop Line Up


Hugs.

Friday, June 26, 2015

Patriotic Pinwheels

Hey everyone! Hooray for the almost weekend!  w00t w00t!

Ok well, enough of that..the fourth of July is coming and I had to share with you this fun little pinwheel I made using some older Echo Park paper and Rhinestone Sticker Sheets from the Buckle Boutique. that I cut with an older Sizzix die.

I started out by cutting and assembling the base for my pinwheel.
Begin with a square.  Fold your corners so that you get marks on the diagonals.  Cut in from the edge leaving about 1 inch to the center.
Then all you need to do is fold every other corner and gather at the center.  I used a brad to hold these corners down.

Now for the fun part.  Creating the rhinestone medallion in the center.  I used one of my Sizzix circle dies and the clear Dazzling Diamonds.  Love this sheet...totally my fave.  So versatile.
Then I cut the Sizzix flag with white cardstock, followed by blue and red Dazzling Diamonds rhinestone sticker sheets.
It is really easy to cut these gel rhinestones with a favorite pair of scissors.
I cut out the parts I needed and layered the flag pieces together.  Finishing with sticking them in the center of the circle.  Love!!!!
In the end I took out the white star I had cut and let the rhinestones show through from the back.  It was simple to add a nail through the papers and into a dowel to allow the pinwheel to spin.
Hugs. 

Wednesday, June 24, 2015

Accept Home Decor Clear Scraps and Crate Paper

Hi everyone, Today I want to share with you a fun, custom, wall decor piece I made using an XL Dots and a custom Clear Word Title.  Did you know you can get custom orders from Clear Scraps?  

My One Little Word this year is Accept.  Sometimes I find it difficult to accept things the way they are.  So I made this home decor piece to remind me to accept the things I can not change.  Whether that is with my body, my relationships, my children.  Sometimes you just have to let things go and accept them the way they are.  It really is hard for me and my perfectionist tendencies to just let things go....

Anyway....I of course used some of my favorite Crate Paper papers and embellishments and a few flowers from I Am Roses.
Accept_clearscraps_crate paper_nancy keslin
To create the texture on my word title I simply painted the back side with a bit of acrylic paint, then used Staz-on White ink to stamp a pattern with a stampendous stamp.  After stamping with the white ink, I added a bit of color with another ink pad.
I am really happy with the way this turned out.  

Thanks for stopping by.
Hugs.

Thursday, June 18, 2015

You Make Me Smile - Clear Scraps and Ruby Rock-it

Hi everyone!  Hope you are having a great day.  Things here are as crazy as they get when in the heat of cabana swim season, but oh how I do love my little penguins.

Today I wanted to share with you a mini album I made using the  Clear Scraps Mixable Tags 6x8 Album and the Nostalic collection kit from Ruby Rock-it.   How fun that the two companies are teaming up this week. 


 Love the papers in this collection...and of course I am forever boring you with my love of the Mixables from Clear Scraps.
Thanks for stopping by and have a great day.

Hugs.

Wednesday, June 17, 2015

Send It Clear with Clear Scraps and Ruby Rock-it

Hey everyone!  Hope you are having a great week.  Summer hear has been fun so far and I am dreading how quickly the time is flying.  I am not, repeat NOT ready for this fall, so those of you who keep posting on Facebook that there are only 190 more days till Christmas.  EEEEK  Stop it!  LOL

Anyway, today I wanted to share with you a simple little card I made using the  Clear Scraps Deco Send it Clear Card and the Rustic Charm collection from Ruby Rock-it


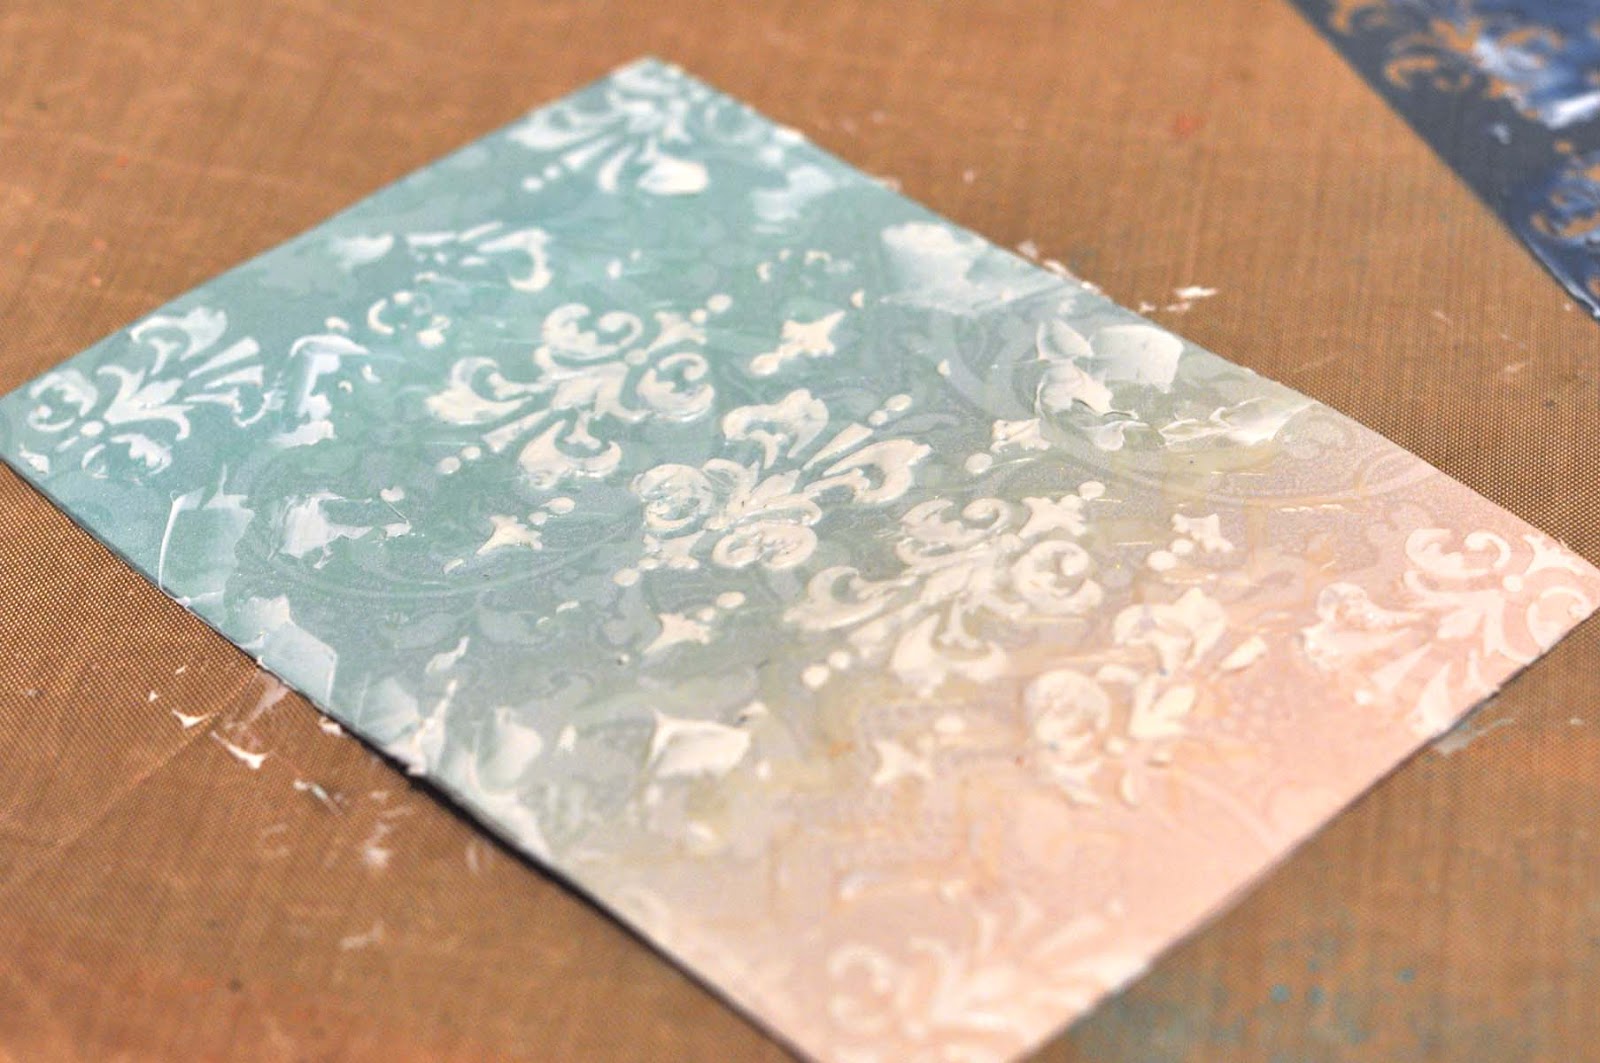
To add even more dimension and texture to the back ground paper I used a few of my favorite Mascils and some embossing paste and gel medium.
Step 1:  Spread gel medium over patterned paper using a palette knife and the 6" Chevron Mascil
 
Step 2:  When that dries, use embossing paste over the 6"Damask Mascal to add even more interest.
 
Step 3:  Add additional smears of embossing paste to add a bit more texture around the edges if desired.
If you like, you can add a few flecks of white mists or other colors to really enhance the texture.

I simply adore the colors in this collection, and the lovely pearl finish on these papers make them extra special.  Be sure and check out the Clear Scraps blog to see all the beautiful projects made with Ruby Rock-it and Clear Scraps this week.

Hugs.