Showing posts with label topiary. Show all posts

Wednesday, June 11, 2014

Topiary Tutorial - Darice and Core'dinations

Hello everyone!  Ah, summertime!  I so adore being out of school...long lazy days and beautiful weather.  I think a trip to the beach is in order.  But before I go, how about I share with you this topiary I made for Darice with Core'dinations paper and a few basic craft supplies.
Spring-DIY-topiary-Darice

Spring DIY topiary supplies:

Step 1: The first step is the most fun – creating the flowers.  I chose three beautiful colors of Core’dinations cardstock for my paper flowers. Then, I used my Cricut electronic cutting machine and the Flower Shoppe cartridge to create a ton of flower die cuts.  I cut each of the spiral flowers to 2.5 inches.  I was able to get 16 flowers per sheet of cardstock. Cut Cricut Flowers
Step 2: Assemble the flower die cuts.  Each assembled flower should measure approximately 1 1/4 inches across.  You don’t want to roll them too tightly.
rolled flowers_darice_nancy keslin_topiary
Step 3: I sanded each flower to expose the lighter core of the paper as well as open up the flower.  You can see the difference below.
sand photos_darice_nancy keslin_topiary
Step 4: When you complete the sanding process, begin gluing the flowers to the Styrofoam ball in a random pattern.
glue flowers_darice_nancy keslin_topiary
Step 5: If you would like to make a double DIY topiary like mine, cut the dowel rod into multiple pieces. The lower rod should be 12 inches and the top rod 3 inches.  Stick one dowel rod into each of the flower balls and then the shorter lollipop into the longer. Place the Styrofoam disk into the flower pot and then the lollipop flower through that.
Spring-DIY-topiary-Darice-nancy-keslin-1
Step 6: Add some moss to the top of the pot to hide the disk.
topiary_darice_nancy-keslin
Step 7: Add a pretty satin bow to the base of the DIY topiary flower ball.
topiary_close up_darice_nancy keslin
 I hope you give this spring DIY topiary a try.

Tuesday, April 1, 2014

Darice Blog Sneak Peek

Hey everyone!  Just a quick drive by to let you know I have a post today up on the Darice blog, Live, Craft, Love.  If you get a minute, sneak over and check it out!  There is a tutorial for creating this.....


Hugs


Thursday, March 28, 2013

Pack Your Bags and Scoot to Hydrangea Hippo


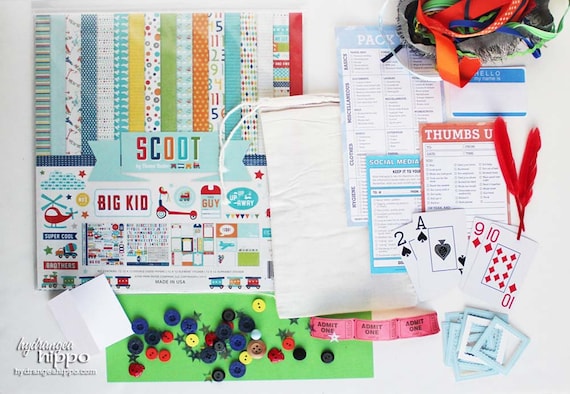
Hi everyone! Today I wanted  to share with you a few projects I made with the Hydrangea Hippo Pack Your Bags and Scoot crafting kit that was featured over on the Hydrangea Hippo blog a few weeks ago.

When I saw this kit I loved the fun colors and embellishments and couldn't wait to start creating.  In the end, I was amazed at the variety of projects I was able to create.

Although this paper line from Echo Park seems geared toward younger children, I found that the colors and patterns when mixed with the kit embellishments were perfect for my older teen and started out with a 12x12 layout.
The sticker sheets and papers in this kit contained many train and travel related elements, so I decided to use my Cricut to cut a mini album in a train shape to feature a few of the photos from our cross country train trip.  Yes, this was just a few years ago.....look at those baby faces.  hee hee
 
And finally, for something completely different I decided to create a rose topiary as a bit of home decor.  I used my Tim Holtz pinecone die with my Sizzix and lots of the papers in the kit to make the roses.  I punched my butterflies out of the playing cards and then layered on the trims.  Hydrangea Hippo always has the most gorgeous trims.....


I still can't believe the variety of projects I was able to make with this kit.  From beautiful, spring, home decor, a project for an older teen, to a mini album filled with photos of my children when they were younger, this kit offers something for everyone.

Be sure and grab your kit today and get started creating.

Hugs.

Nancy