Today I wanted to start with this cute little Halloween goodie bag I created with Chibitronics, a file from SVGCuts, my Cricut and of course some of my favorite basics...papers from Core'dinations.
I began with a the treat bag file from the Fright Night Collection, which I cut with my Cricut Explore from a combination of the Core Basics Patterns, Orange Small Dot, Core Basics, Black, and the Orange from the Core Essentials Brights Collection.
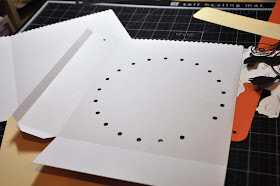
After I cut all my papers, the fun of assembling and lighting up the bag with Chibitronics began. First I created my parallel circuit. I marked dots on my backing piece where the holes on the bag were, so I would know where to place the lights. Please don't break your copper tape, two continuous loops are necessary. (yes, I know this from experience) And be sure leave enough overhang to add your battery later.
From there I simply added my LED lights, I chose to add one to every other hole because I didn't want to over work my battery. How simple was that....I have a light now at each hole.
Pretty cool, right? But wait....Chibitronics just came out with some super cool effects stickers and you know I had to give them a try. Adding the effect sticker was a bit more complicated, and being that I was working in a limited area I used a bit of masking tape as an insulator. You can see the effects sticker layout directions here.
From there, I simply finished the assembly of my bag. Ok, yeah, I know those are all still photos, so you can't see how cool it is that these lights now blink...or can you? Check out this short video of the bag blinking....
Thanks for stopping by.
Hugs.


No comments:
Post a Comment
I love to hear from you, thanks for sharing.