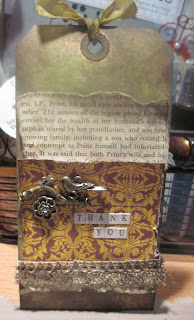
Hi everyone, I am back with more fun techniques with Distress Inks. Today I want to share how to make a "wrinkle free" distress. For this technique you will need various colors of distress inks and a craft sheet.
Begin by directly applying various colors of Distress Ink Pads to the surface of the craft sheet.
Then drag your tag across your craft sheet.
If you have any un-inked areas simply place that area of the paper on any left over ink on the sheet.
Finally Dry your paper or tag using an iron or heat tool.
To finish the look, ink the edges with a contrasting color.
For the final project I spritzed my tag with a bit of Tattered Angels Glimmer Mist. I added a bit of Prima lace that I dragged across an ink pad and a few Vintage Trinkets.
Kitchen is coming right along. I should be back in tonight....It isn't finished, but is fully functional! I still need paint, window trim, pendant lights, and tile (as well as a few behind the scenes things) but we are getting close! Woo Hoo!!!! BTW, I think I am missing Menu Monday's as well. hee hee
Hugs
Nancy
Nancy


I need to do this technique and make some tags!!!
ReplyDeleteThank you very much for sharing your technique Nancy. I really like the ink color that you used and the finished tag is awesome.
ReplyDeleteWhat a simple and fabulous technique!
ReplyDelete