Here is what you will need.
 Colored Pencils, odorless paint thinner (also known as Gamsol, odorless mineral spirits), paper stubs or cotton swabs, and your image.
Begin by outlining the area you wish to colorize. You don't need to be precise.

Apply the blending medium to your cotton swab or paper stump. You can dip the swab into the liquid or invest in a pump type bottle. Using a circular motion, drag the color from the outline toward the inside of the area.
 As you can see, the center spaces are lighter than the area you outlined to start. You can continue dragging the color with your stub or swab until you get the desired effect.
 You will want to change stubs or swabs as you change colors.
To color the cheeks I added the pink color directly to a swab that had the mineral spirits already applied.
 If you like, you can add a shadow to the image in a similar way. Begin by coloring a line around the outside of your image.
 This time, instead of dragging the color toward the center of the area, drag it out.
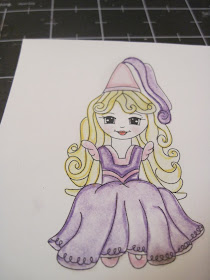
And here is my final project.
 And, just to prove that anyone can do it....here is Ainsley's, my 9 year olds take.
All those lines, the ones we all hate, the ones that show which direction we are coloring in...gone! She hasn't really figured out the shadowing part, but she is getting there.
Hope you have fun with coloring.
Hugs.
Nancy


Thank you for sharing your technique.
ReplyDeleteGreat tutorial and tips... I'm definitely going to try it!! I don't have any copic markers either, but I really want them. Thank you sooooo much Nancy & Ainsley!! :)
ReplyDeleteGod bless & big hugs...
Tracy
So cool!!! What a fun technique.
ReplyDeletei'm horrible at coloring. :)
ReplyDeletehugs,
sarah.
Thanks for sharing this! I do not have any copic marker (they are soooo expensive) but I love your technique! Great job, Ainsley, too!!!
ReplyDeleteWhat a fabulous idea!!! I am so going to try this!! You make it look so easy (and beautiful!!!) Who needs copics?
ReplyDeleteReally fun tutorial Nancy. Definitely one I will have to try! Tell Ainsley that I said hers was really pretty too!
ReplyDelete